
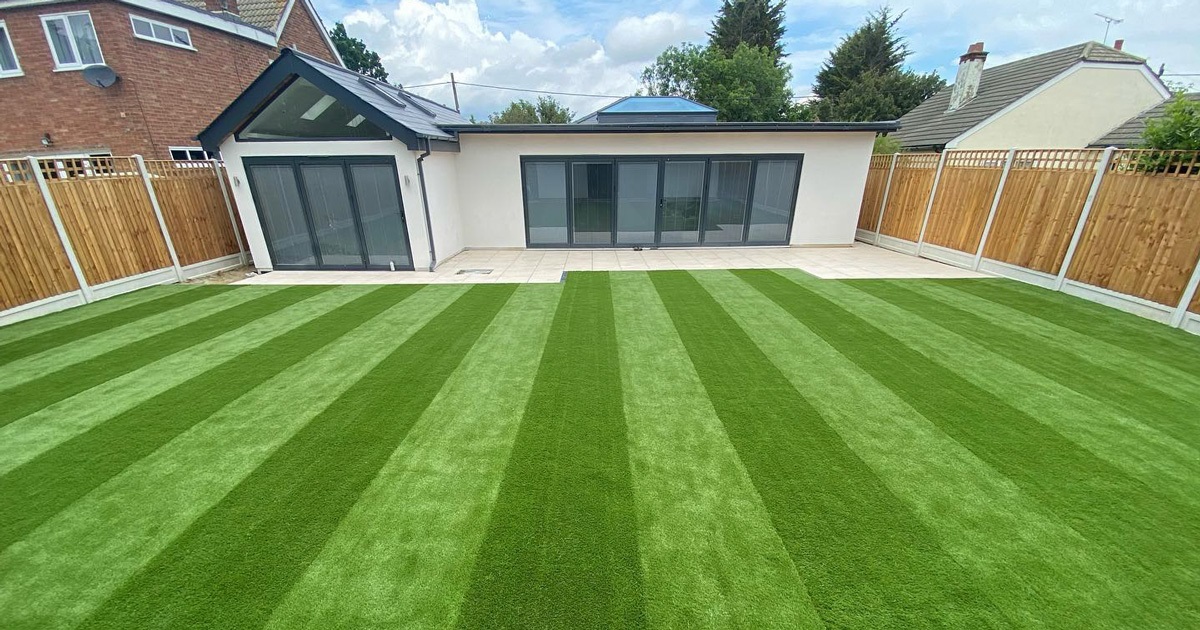
Artificial grass has continued to increase in popularity over recent years as evolving tools, technologies and materials produce synthetic lawns that are more cost-effective, robust and realistic than ever.
For homeowners, businesses and families looking for a straightforward alternative to traditional grass, artificial lawns can be the perfect solution and come with a whole host of additional benefits. Not only is it extremely safe, low maintenance and eco-friendly, but it looks good year-round and helps to save money with no need to mow, water or pay out for fertilisers, pesticides and reseeding.
If you have been considering artificial grass installation Essex for your outside space but would like to know more about the process, then the experts at Luux Landscapes can help. Here we take you step by step through the installation process to give you some insight into what it entails and what you can expect if you decide to transform your outside space with artificial grass.
● Applications
Artificial grass can be used for various applications, the majority of which will tend to be replacing an existing lawn, but it can also be used on top of decking, concrete or on terraces and balconies. These different applications can therefore have different methods for preparing and installing the synthetic turf, depending on the surfaces on which it will be placed as well as its size, use and location.
Here we are going to use the example of a standard installation, replacing a natural grass lawn with new artificial grass.
● Step 1 – Clear and Excavate
The site where the new grass is going to be laid needs to be properly cleared and excavated using a turf cutter to cut any existing sod into tidy, easy-to-remove rolls. Once the turf is removed, the surface must be excavated to around 40-50mm below the required finish height.
During this step, we are always extremely thorough in order to ensure that all traces of weeds, vegetation and organic material have been removed to prevent any future disruption to the new artificial lawn. We also recommend cutting back or trimming any plants, shrubs or bushes that could hinder installation.
● Step 2 – Install the Sub Base
Upon completion of the excavation, the next phase involves installing the sub base. Typically made of gravel or crushed stone, this is spread evenly over the surface, then raked and levelled to an aggregate depth of around 30-40mm.
Once this has been compacted, we apply a 10-15mm layer of sharp sand which is designed to aid drainage and create a smooth, flat finish. To ensure that this layer is even, a whacker plate or even a heavy hammer and builders’ plank is used to compact and level the surface. Bumps, lumps and imperfections at this phase could seriously impact the finish of the artificial lawn so it’s important to do it right.
● Step 3 – Lay Down a Weed Membrane
This essential step involves a breathable, durable membrane that helps to prevent weed growth without negatively impacting the new lawn’s drainage. To install we lay the membrane over the sand layer, covering the entire lawn area and slightly overlapping the edges. It is then secured with U-pins or landscape staples to make sure that it is secure and won’t shift or move during the installation process.
● Step 4 – Now For the Fun Part, The Artificial Grass
The new synthetic grass is unrolled and placed into position, taking into account which direction the pile should face and which way it would look best from the main viewpoint. Often the grass needs to be left for an hour or two to settle and acclimatise in order to ensure that there are no ripples, but this can depend on the type of grass and how it is packed.
Then the grass is carefully cut to the correct size and shape, following the lawn boundary edge for a seamlessly snug fit and securing to the boundary perimeter using U-pins or similar.
In cases where there is a seam or joints, the process is repeated with the different pieces of grass lined up and checks carried out to ensure the pile direction matches. The pieces are then joined together using joining tape and adhesive before being placed back into position.


